Discover the beauty of Rose Hydrosol and all its benefits with this simple DIY chemistry project – one that I guarantee will never let you feel intimidated by science again! And it’s not just about pampering yourself; it’s a wonderful practice of self-love. Below are all the directions and benefits on how to make ROSE HYDROSOL. Not a fan of roses? You can use almost any flower you like. My other favorites (though Rose is my #1) are lavender, jasmine, and orange blossom.
What is Rose Hydrosol you ask?
Rose hydrosol is the by-product of essential oil production and is created from the water used to steam distill plant materials. In this process, the whole plant is used rather than just the rose petals. When water vapor moves through rose petals, stems, and leaves, it picks up some of the oils along the way. Once the water is cooled and becomes liquid, the condensation is called rose hydrosol. This distilled water contains the beneficial plant minerals left behind, and these are the essential compounds that give rose hydrosol its fame when it comes to its numerous skin benefits.
After doing some research, I’ve compiled a list of the benefits of Rose Hydrosol:
- Retains moisture in the skin, offering deep hydration.
- Lifts dirt and oil from the skin thanks to its astringent properties.
- Helps reduce the appearance of fine lines.
- Softens and tones the skin.
- Possesses anti-inflammatory and antibacterial properties, providing relief from irritated skin, acne, eczema, and psoriasis.
-
For detailed, step-by-step instructions on creating your own Rose Hydrosol, please see below:
What you need – and great news, you have all of this in your kitchen.
- Rose petals, stems, and leaves from about six very fragrant roses. Or your flower of choice, remember it does not need to be roses.
- Large cooking pot and a lid that fits snugly.
- 2 small, heat-safe glass or ceramic bowls. One of these bowls will be collecting the rose distillation.
- Ice.
- Ziploc bags for ice (so it can be easily replaced after it melts).
- 6 cups of distilled water.
- A small spray bottle.
Here are the Steps – and it is simple Chemistry 101!
Step 1: Place a heat-safe bowl upside down in a pot. Next, drop your rose petals around the bowl, but not on top of the bowl. If you want an extra-fragrant rose water, use more plant material. You can also mix in herbs of your choice.

Step 2: Pour distilled water carefully over the petals until the water level reaches a height of about 1 inch below the lip of the bowl. Place your second heat-safe bowl in the pot so that it rests on top of the overturned bowl.

Step 3: Place the pot lid on the pot (upside down, so the lid creates a concave space where you will place your ice cubes). When the steam from the water containing the plant material hits the bottom of the icy cold lid, it will create condensation and drip back into the empty bowl. This is your flower water.

Step 4: After your pot has finished simmering, turn off the heat and let it cool (with the lid still on so you don’t lose any hydrosol from evaporation). After it cools, remove the bowl with your hydrosol and pour it into a bottle or jar to store. You can make your hydrosol extra aromatic and therapeutic by adding a couple of drops of rose essential oil.
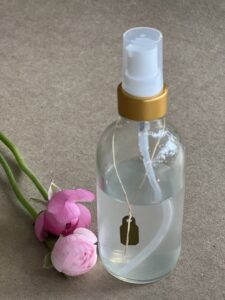
Here is my bottle, the color will vary but will most likely not be rose colored.
Now you’re all set to enjoy the benefits of your homemade rose hydrosol! Let me know how yours turned out and send me a picture of your creation too!
Marisa
If you like this content and want more get access to my weekly Blog drop here and get a copy of my Yoga Journal too. The Journal is designed to help you keep track of your healthy lifestyle practices.
Interested in Ayurveda Consultation with me? I’d love to work with you. Go here for information and how to begin.
Follow me on Instagram
Follow me on LinkedIn

